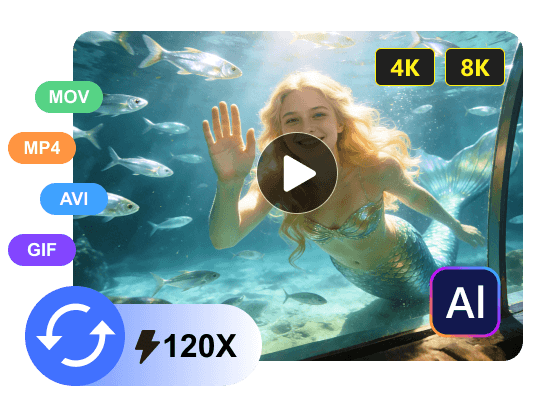
Video Converter Ultimate
![]() 100% Seguro. Sin anuncios.
100% Seguro. Sin anuncios.
![]() 100% Seguro. Sin anuncios.
100% Seguro. Sin anuncios.
Contenido
Te encontrarás con situaciones en las que ciertas partes de los vídeos necesitan una mayor nitidez en cuanto a resolución. Esto me ocurre con frecuencia, y en lugar de buscar otras alternativas, decidí someter a Adobe Premiere Pro a la prueba definitiva para mejorar la calidad y la nitidez.
Este tutorial muestra Cómo mejorar la resolución de vídeos en Premiere Pro Mediante el uso de diversas técnicas y herramientas propias, aprenderás qué técnica funciona mejor en situaciones prácticas y algunos consejos prácticos para obtener grabaciones más nítidas.

Utilizar las opciones "Ajustar al tamaño del fotograma" y "Escalar al tamaño del fotograma" es probablemente uno de los métodos más sencillos para adaptar tu vídeo a una línea de tiempo de mayor resolución en Premiere Pro. Sin embargo, aunque estas dos opciones parecen casi idénticas, funcionan de forma diferente, lo que puede generar resultados distintos en cuanto a la calidad final del vídeo.

Aquí tienes una comparación clara que te ayudará a comprender la diferencia entre las dos opciones en Adobe Premiere Pro:
| Elemento | Ajustar al tamaño del marco | Escalar al tamaño del marco |
| Cómo funciona | Ajusta la escala para adaptarla a la secuencia sin cambiar la resolución original. | Cambia el tamaño del clip modificando su resolución. |
| Calidad de Imagen | Mejor calidad (no destructivo) | Puede reducir la calidad |
| Flexibilidad | Editable y ajustable en cualquier momento. | Menos flexible después de escalar |
| mejor uso | Recomendado para la ampliación de flujos de trabajo. | Solo redimensionamiento básico |
| Rendimiento | Un poco más pesado pero más preciso | Más rápido pero menos preciso |
Ventajas
Desventajas
Para mantener la calidad mientras cambiar el tamaño de vídeo, usa Ajustar al tamaño del fotograma. ¿Se puede aumentar la resolución de un vídeo en Premiere Pro? Sí, se puede hacer, pero las técnicas suelen redimensionar en lugar de mejorar la resolución.
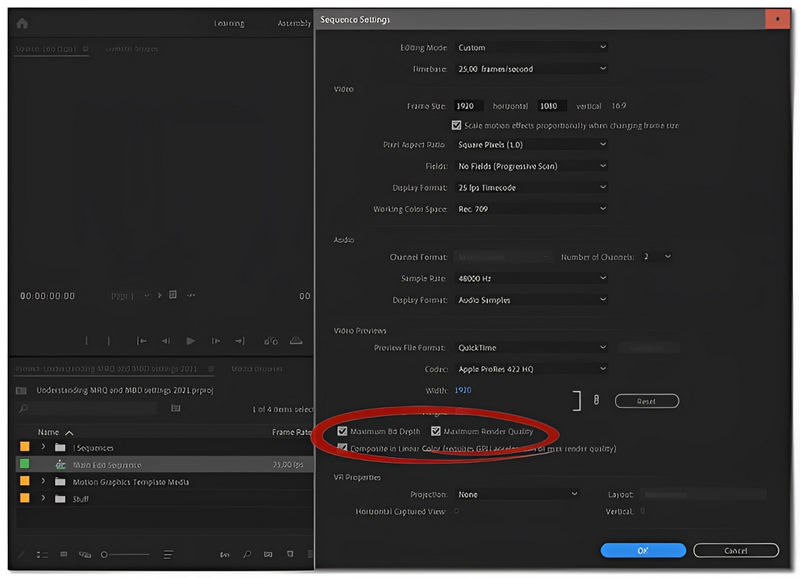
Una forma sencilla de mejorar la calidad de un vídeo en Adobe Premiere Pro es activar la opción de Máxima calidad de renderizado. Si bien no creará nuevos detalles de la nada, ayudará a que el metraje escalado se vea más nítido y definido.

Ventajas
Desventajas
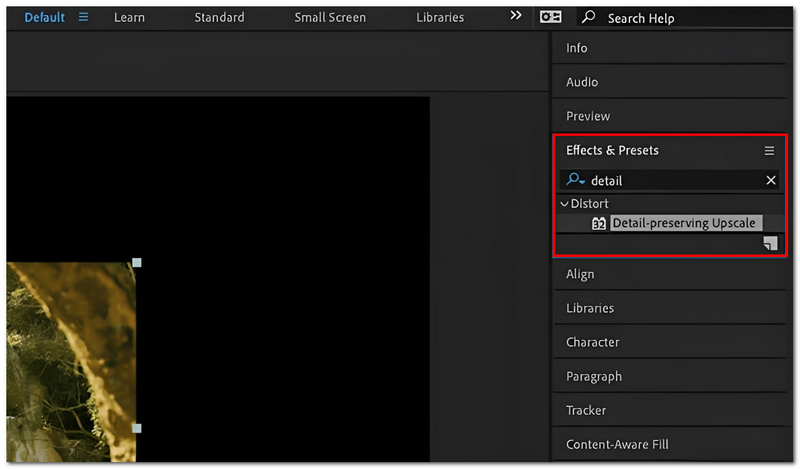
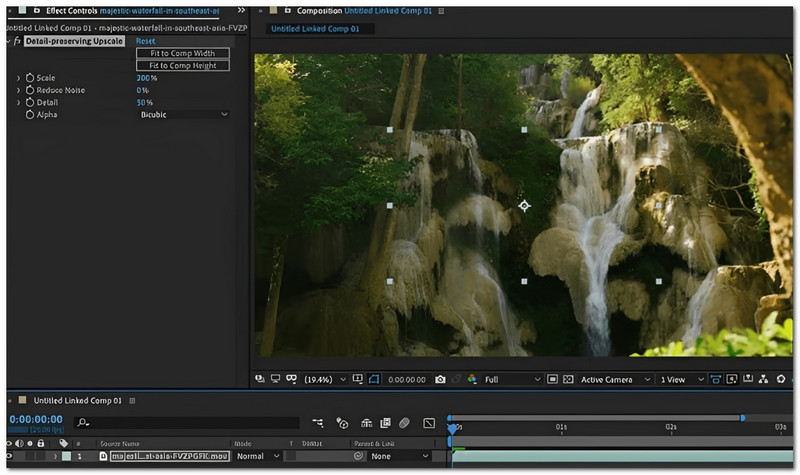
¿Quieres mejorar el tamaño de tus imágenes con inteligencia artificial? Este es uno de los mejores métodos dentro del ecosistema de Adobe. Si conectas Premiere Pro y Adobe After Effects, podrás acceder al efecto de mejora de tamaño que conserva los detalles, el cual recupera la información de forma más inteligente que un simple redimensionamiento.

Ventajas
Desventajas
¿Cómo mejorar la resolución de vídeo con IA en Premiere Pro? Este método es la forma más directa y sencilla de hacerlo dentro del software, ya que mejora los detalles de una manera más inteligente de lo habitual. Sin embargo, aún no se puede comparar con la potencia de los programas especializados. Mejoradores de video de IA.
Si prefiere evitar la instalación de complementos adicionales, puede utilizar las funciones disponibles en Adobe Premiere Pro. Si bien no se basa en inteligencia artificial, si se usa correctamente, puede mejorar la calidad de su material.
Escalado nativo de Adobe Premiere Pro CC
Este software ofrece algunas opciones integradas de escalado y renderizado, cuyo objetivo es mejorar la calidad del metraje:
Ventajas
Desventajas
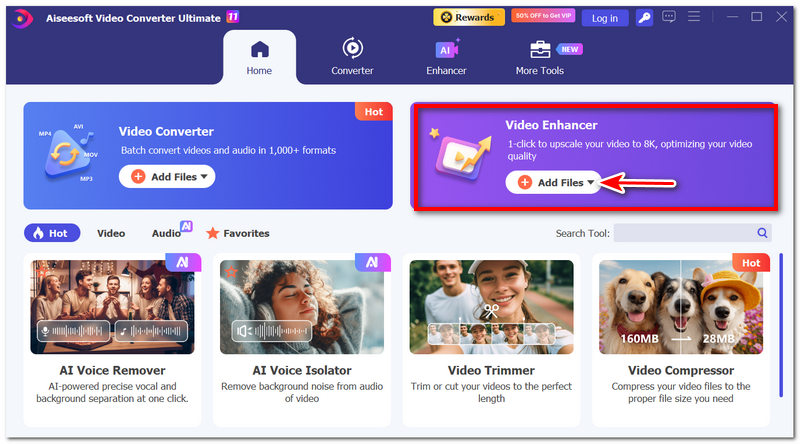
Si buscas una opción mucho más sencilla y ligera en comparación con Adobe Premiere Pro, especialmente para trabajar con conversión de vídeo, edición básica y retoque final mediante IA, entonces Aiseesoft Video Converter Ultimate Actualmente, Aiseesoft sigue siendo una herramienta multifuncional muy fiable en el mercado. Si bien Premiere Pro es un programa profesional con muchas funciones, Aiseesoft se centra en la edición rápida, el cambio de formatos de vídeo y el uso de inteligencia artificial para mejorar los vídeos, lo que puede resultar muy adecuado para principiantes, creadores de contenido y profesionales del marketing.

Descarga
![]() 100% Seguro. Sin anuncios.
100% Seguro. Sin anuncios.
![]() 100% Seguro. Sin anuncios.
100% Seguro. Sin anuncios.
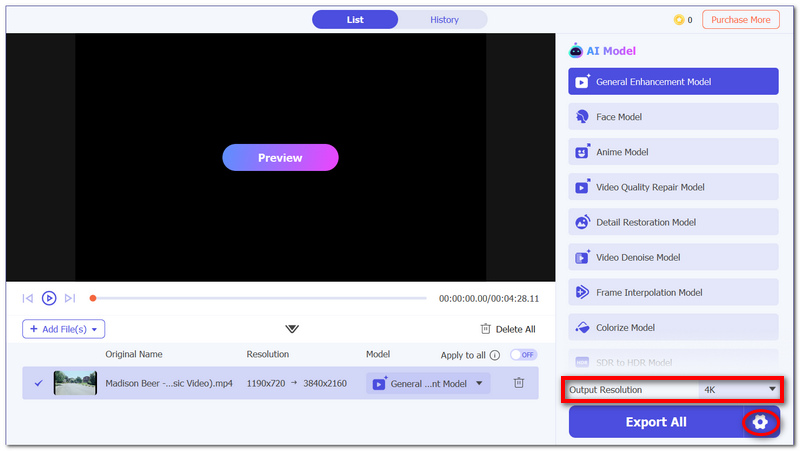
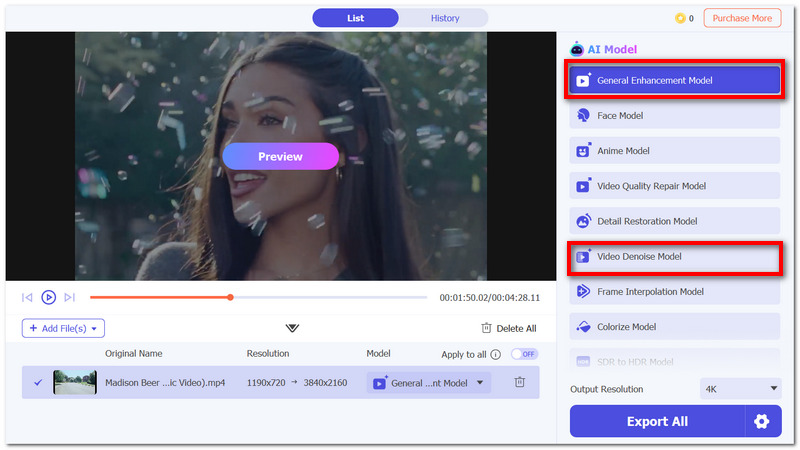
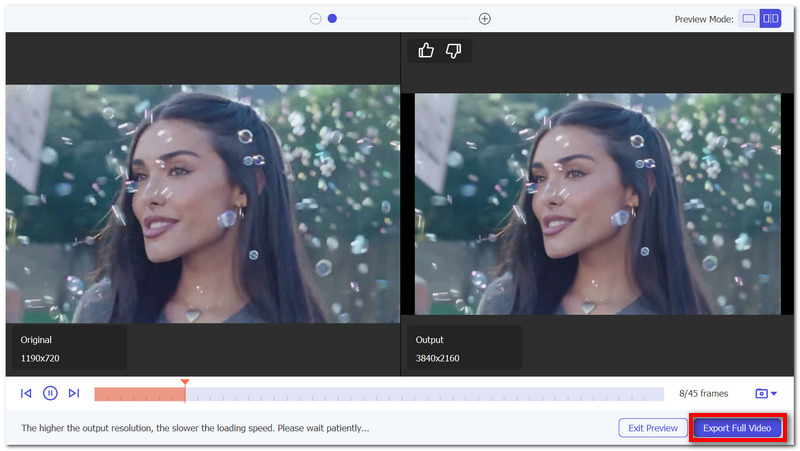
Cómo usar Aiseesoft Video Converter Ultimate
¿Por qué mi vídeo escalado se ve borroso en Premiere Pro?
En la mayoría de los casos, la causa es la baja resolución o la fuerte compresión del metraje original. Si se amplía el metraje, los píxeles se estirarán y no se apreciará mejor el nivel de detalle.
¿Es mejor ampliar la imagen antes o después de editarla en Premiere Pro?
Por lo general, es mejor editar primero y luego ampliar la imagen al exportarla. De esta forma, todos los efectos y cambios se aplican antes del renderizado final.
¿Pueden las secuencias anidadas mejorar los resultados del escalado?
Solo un poco. El anidamiento es una excelente manera de mantener todo ordenado al escalar o aplicar efectos, pero no mejora la calidad real de la imagen ni la nitidez.
Conclusión
Al aumentar la resolución de un vídeo en Premiere Pro, básicamente la estás incrementando. Sin embargo, esto no genera nuevos detalles, por lo que el resultado puede verse algo borroso o poco nítido, sobre todo al trabajar con material de origen de baja calidad. El aumento de resolución es suficiente para un uso sencillo, pero no cuando se busca un resultado muy refinado.
Por otro lado, las tecnologías de IA son una opción mucho mejor si quieres obtener buenos resultados. Dominar el arte de Cómo mejorar la resolución de un vídeo con IA en Premiere Pro Es una de las maneras de llevar la calidad del vídeo a un nivel superior al simple reescalado.
 Consejos: Cómo arreglar Adobe Premiere Pro que no reproduce videos
Estás a punto de obtener una vista previa de un vídeo. Pero, de repente, Adobe Premiere Pro no reproduce el vídeo. Para solucionar los problemas, aquí hay 7 soluciones que puede utilizar.
 Causas y soluciones para videos entrecortados y con fallas en Adobe Premiere
Después de pasar horas editando un proyecto, Adobe Premiere se vuelve entrecortado y tiene fallas, lo que le dificulta obtener una vista previa del mismo. ¡Todavía hay formas de solucionarlo!
 Aprenda a reducir el ruido y a eliminar el ruido de los vídeos en Premiere Pro
¿Premiere Pro tiene una función de eliminación de ruido? ¿Cómo se elimina el ruido de un vídeo granulado en Premiere? Consulta la guía sobre cómo eliminar el ruido de los vídeos en Premiere Pro.
Video Converter Ultimate es un excelente conversor, editor y potenciador de video para convertir, mejorar y editar videos y música en 1000 formatos y más.
![]() 100% Seguro. Sin anuncios.
100% Seguro. Sin anuncios.
![]() 100% Seguro. Sin anuncios.
100% Seguro. Sin anuncios.
*Campo requerido
*Por favor ingrese un correo electrónico válido