El mejor convertidor de vídeo con IA definitivo
![]() 100% Seguro. Sin anuncios.
100% Seguro. Sin anuncios.
![]() 100% Seguro. Sin anuncios.
100% Seguro. Sin anuncios.
Contenido
Estabilizar tu video es esencial para crear un aspecto profesional y de alta calidad. Ya sea que se trate de un vlog grabado con la cámara en mano o de un zoom de alto nivel, Adobe Premiere Pro ofrece una potente herramienta integrada llamada Estabilizador de Deformación para suavizarlo.
Sin embargo, la simple aplicación del efecto suele dar como resultado un fondo inestable (el efecto gelatina) o un zoom excesivo. Este artículo te lo explica. cómo estabilizar videos en Premiere con pasos detallados y las mejores configuraciones.
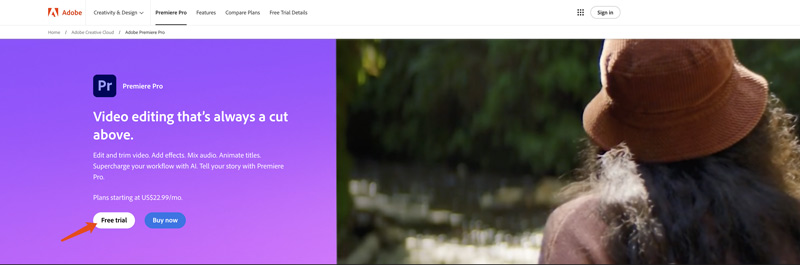
Premiere Pro es un software de edición profesional desarrollado por Adobe. Se utiliza ampliamente para crear vídeos de alta calidad para diversos fines. Premiere incluye todas las funciones de edición necesarias. Adobe te permite utilizar Premiere Pro de forma gratuita durante 30 días. Descárgalo y sigue los pasos a continuación para estabilizar un vídeo en Premiere.

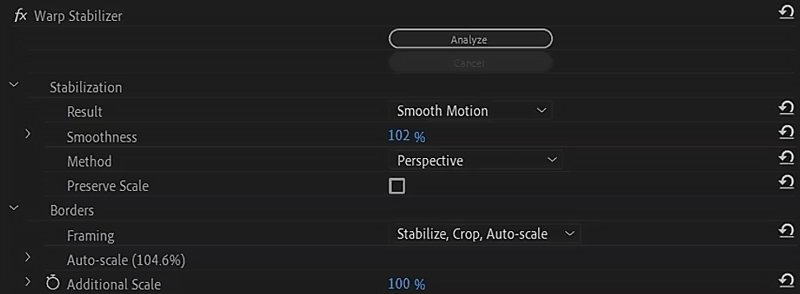
Una vez finalizado el análisis, la configuración predeterminada podría hacer que tu video tenga un aspecto robótico o artificial. Ve al panel Controles de efectos y ajusta estos ajustes:
Suavidad: Cambie esto del 50% al 5% - 10%.
El 50% intenta eliminar todo movimiento, lo que parece falso. Entre el 5 y el 10% conserva la sensación natural del dispositivo en la mano, pero elimina las micro vibraciones.
Método: Cambiar de Deformación del subespacio a Posición, escala, rotación.
Como se menciona en la tabla anterior, esto evita que las líneas rectas (como paredes u horizontes) se doblen u ondulen.
Enmarcado: Asegúrese de que esté configurado en Estabilizar, Recortar, Escala automática.
Si ve barras negras bailando alrededor de los bordes, esta configuración las corrige haciendo zoom ligeramente.
Avanzado (opcional): Si la toma sigue siendo extraña, marque la casilla de Análisis detallado. Esto toma más tiempo, pero registra más puntos del video.
Si bien Warp Stabilizer es potente, tiene dos fallas importantes con las que los editores profesionales tienen problemas:
El "efecto gelatina" (deformación):
Debido a que Premiere intenta curvar la imagen para mantenerla estable, los fondos a menudo parecen estar bajo el agua. Esto arruina el aspecto profesional de las fotos de arquitectura o paisajes.
Pérdida de resolución (recorte):
Para ocultar los bordes borrosos, Premiere hace zoom. Si su metraje es muy movido, puede recortar entre un 20 y un 30 % de su imagen, convirtiendo su video 4K en un desastre borroso de 1080p.
Hardware pesado:
Analizar clips de alta resolución requiere un uso intensivo de la CPU. Analizar en segundo plano puede ralentizar el equipo si tiene varios clips.
Si desea estabilizar el metraje sin recortes excesivos ni ajustes complejos, necesita una herramienta impulsada por IA.
Si solo desea estabilizar rápidamente su video y mejorar la calidad, especialmente cuando no tiene el programa Premiere instalado en su computadora, puede intentar usar primero algunos mejoradores de video especialmente diseñados. En comparación con Premiere, estas herramientas suelen ofrecer una forma más efectiva y sencilla de realizar la estabilización de videos.
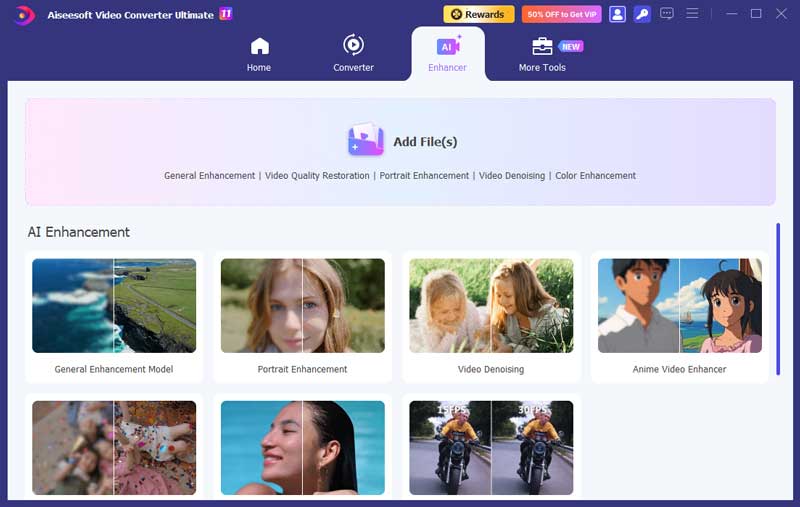
Esta parte recomienda el potente software de mejora y ampliación, Aiseesoft Video Converter Ultimate, para que estabilices los videos, reduzcas el movimiento de la cámara, elimines el ruido de fondo, aumentes la claridad y optimices la experiencia visual general. Utiliza IA avanzada para analizar de forma inteligente el momento original de la cámara y los problemas de movimiento, y luego estabilizar tu video.
![]() 100% Seguro. Sin anuncios.
100% Seguro. Sin anuncios.
![]() 100% Seguro. Sin anuncios.
100% Seguro. Sin anuncios.
Es posible que a menudo grabes videos temblorosos, a pesar de que la tecnología antivibración de la cámara se ha vuelto más desarrollada. Para que tu video sea menos tembloroso, puedes intentar grabar con un trípode. El uso de un trípode puede minimizar eficazmente el movimiento de la cámara desde el principio.
Si tu teléfono o cámara está equipado con una función de estabilización, debes habilitarla para estabilizar el video. También puedes probar distintas técnicas de estabilización para lograr el nivel de estabilización deseado. Además, puedes ajustar distintas configuraciones para que el video capturado sea menos inestable.
Para estos videos grabados o descargados inestables, puede confiar en Premiere Pro, VidHex u otros asociados. Vídeo más fluido herramientas para estabilizarlos.
¿Cómo estabilizo un video en Premiere Pro sin recortarlo?
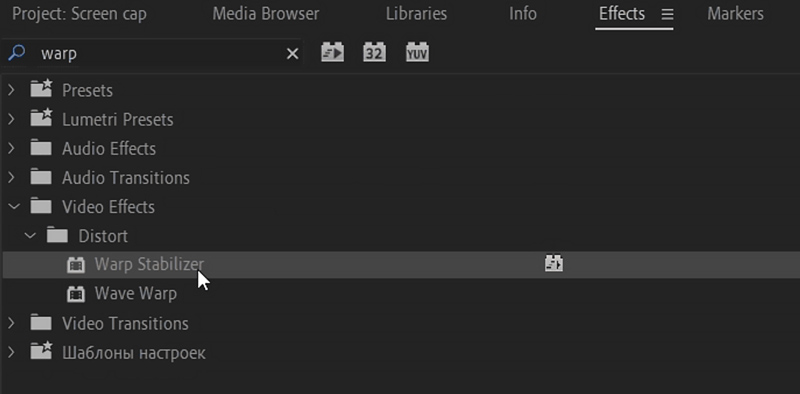
Como se mencionó anteriormente, puede confiar en el efecto Warp Stabilizer para estabilizar un video en Adobe Premiere Pro sin recortarlo. Agregue el video movido y colóquelo en la línea de tiempo para editarlo. Vaya a la sección Efectos, elija Efectos de video y luego busque y haga clic en la opción Distorsionar. En Distorsionar, puede aplicar el efecto Warp Stabilizer para hacer que su video sea más estable y fluido. Luego, Premiere Pro analizará el video para estabilizarlo.
¿Por qué el estabilizador de deformación está atenuado o no funciona?
Esto suele ocurrir si se ha modificado la velocidad del clip (cámara lenta/avance rápido). Para solucionarlo, haga clic derecho en el clip, seleccione Anidar y aplique el efecto a la secuencia anidada.
¿Puede el estabilizador de deformación corregir el desenfoque de movimiento?
No. Solo estabiliza la posición del encuadre. Si la cámara se movió tanto que la imagen quedó borrosa, Premiere no puede corregirla. Necesita un potenciador de video con IA (como VidHex) para corregir el desenfoque de los píxeles.
¿El estabilizador de deformación reduce la calidad?
Sí, un poco. Al ampliar la imagen para recortar los bordes temblorosos, se pierde algo de nitidez. En grabaciones 4K, esto es insignificante, pero en grabaciones 1080p, la suavidad puede ser notable.
Conclusión
Si ya tienes esta herramienta en tu computadora, puedes seguir la guía anterior para hacerlo fácilmente. estabiliza tu video en PremiereComo ya se ha mencionado, Adobe te ofrece una prueba gratuita de 30 días para utilizar Premiere. También puedes descargarlo y probar el efecto Warp Stabilizer.
 Guía completa sobre cómo mejorar vídeos en Premiere Pro
¿Se puede mejorar la calidad de video en Adobe Premiere Pro? ¿Tiene un optimizador de video con IA? Aprende a mejorar la calidad de tu video con Premiere Pro aquí.
 Animación fluida: cómo lograr que tus animaciones se vean fluidas
Descubra cómo crear animaciones fluidas con sencillos pasos, trucos de After Effects y VidHex que mejoran el movimiento para obtener resultados realistas y perfectos.
 Los 5 mejores optimizadores de vídeo gratuitos (en línea y para PC) [Reseña de 2026]
Compara los mejores optimizadores de video gratuitos como CapCut, Media.io y Picwand. Corrige videos borrosos, mejora la resolución a 4K y elimina el ruido. Descubre las ventajas, las desventajas y las mejores alternativas de escritorio con IA.

Video Converter Ultimate es un excelente conversor, editor y potenciador de video para convertir, mejorar y editar videos y música en 1000 formatos y más.
![]() 100% Seguro. Sin anuncios.
100% Seguro. Sin anuncios.
![]() 100% Seguro. Sin anuncios.
100% Seguro. Sin anuncios.
*Campo requerido
*Por favor ingrese un correo electrónico válido