Video Converter Ultimate
![]() 100% Seguro. Sin anuncios.
100% Seguro. Sin anuncios.
![]() 100% Seguro. Sin anuncios.
100% Seguro. Sin anuncios.
When you open your iPhone camera, you want to shoot a high-quality video to save or share. But things don’t always go as we imagine—videos often end up blurry and shaky due to unsteady hands, or too dark because of poor weather. Don't worry, most of these problems have corresponding solutions. With the help of this article, you can easily change video capture quality en tu iPhone.
Let's begin by learning the basics of video quality, so you can process it more clearly and logically. There are 4 main factors that affect video quality.
One key point to highlight: A finished video can be resampled or re-encoded to change its resolution or frame rate, but footage shot in 720p at 30 fps cannot be magically converted to lossless 4K at 60 fps. We can only enhance its perceived clarity and smoothness with post-processing techniques.
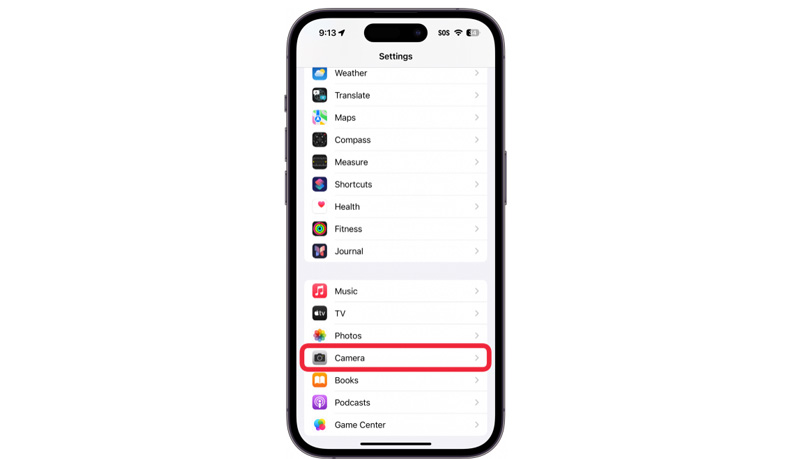
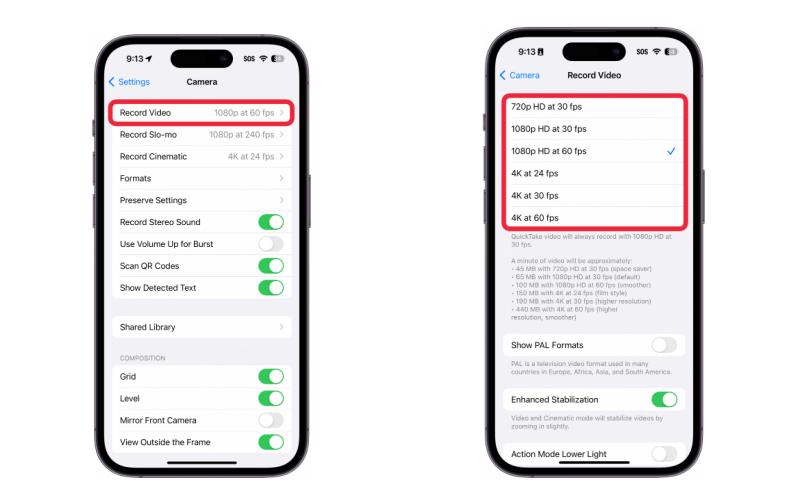
It is easy to adjust your iPhone’s camera settings before shooting. Proper iPhone camera settings let you achieve ideal results right from the start, avoiding excessive time spent on changing video quality after recording.
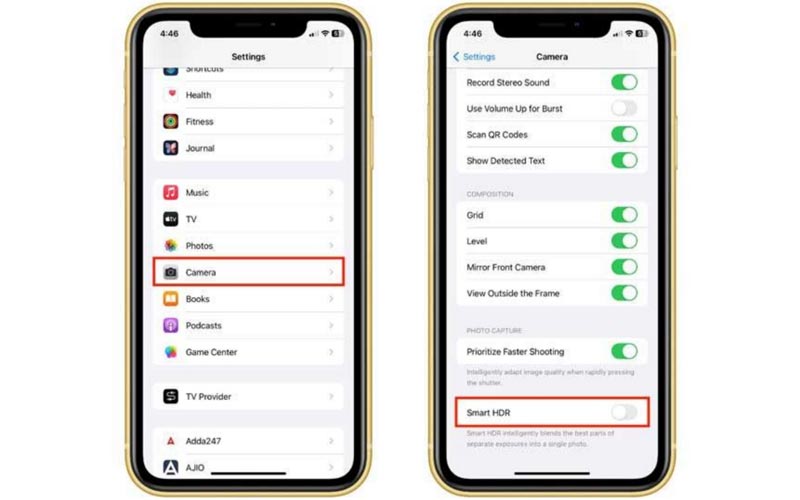
Here are additional tips for pre-recording preparation, which help you avoid issues while recording. You can use a basic phone mount to ensure stability, and wipe the camera lens clean to restore its native clarity.
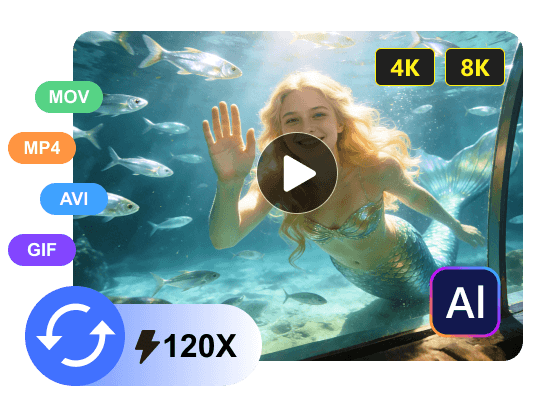
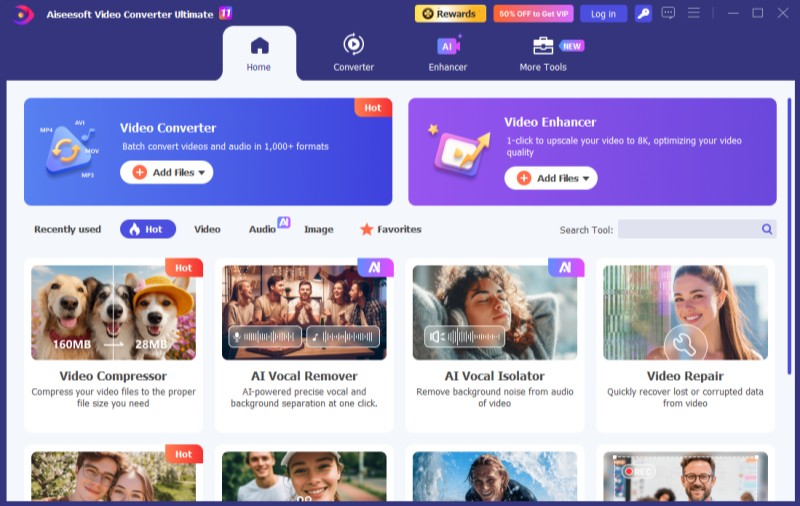
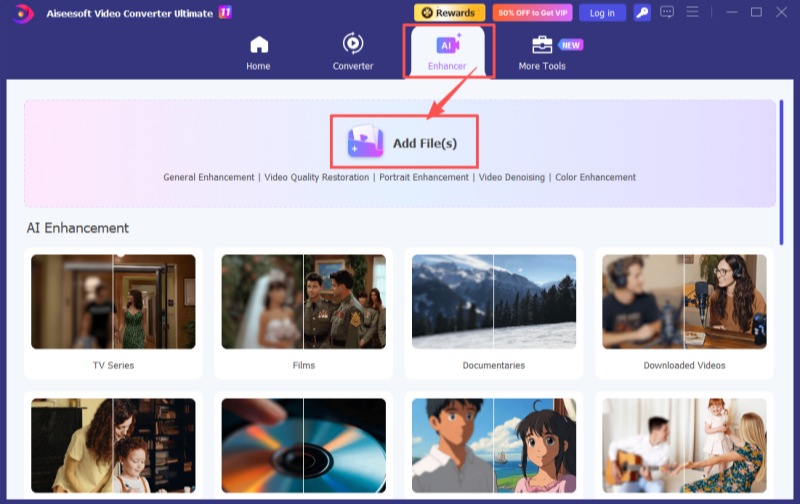
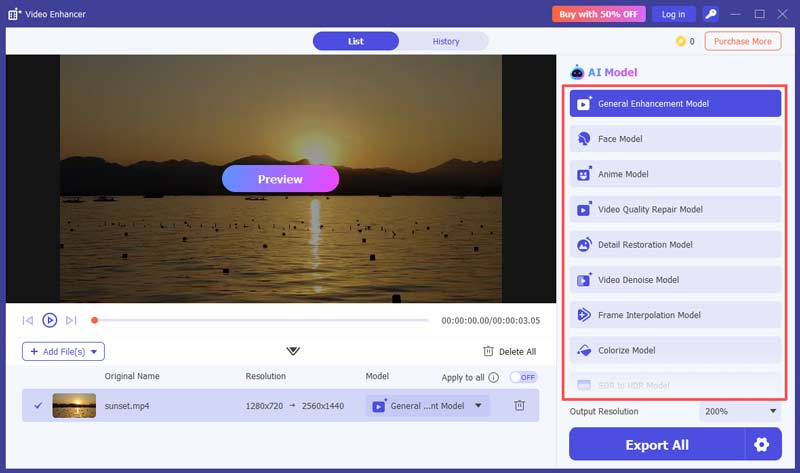
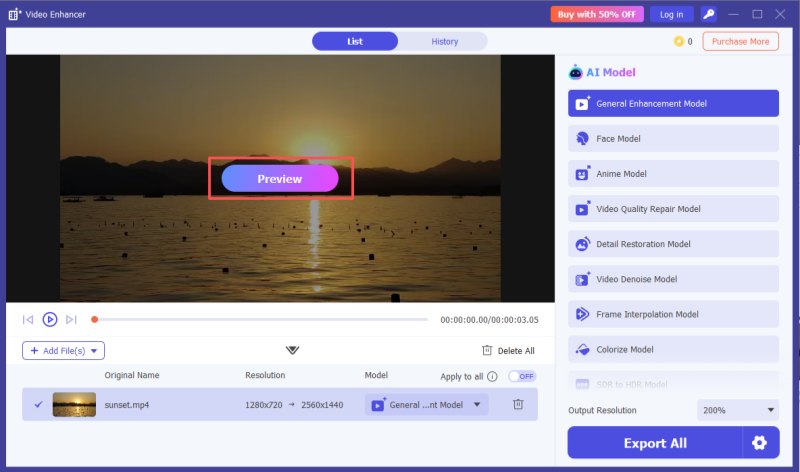
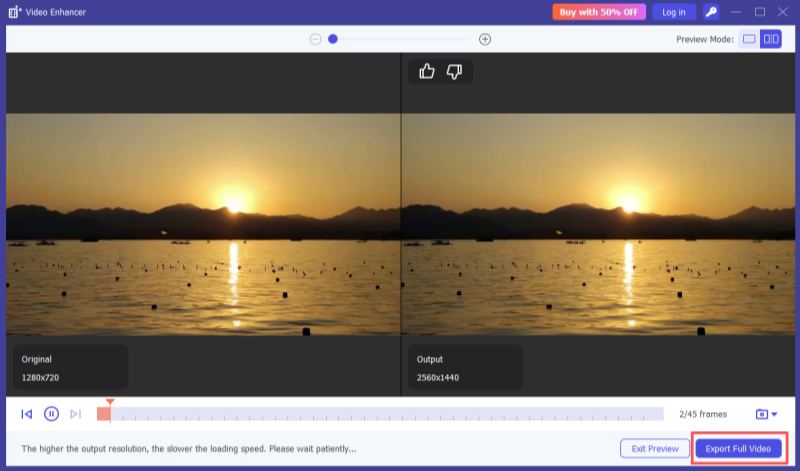
If you need to change video capture quality after recording with iPhone, Aiseesoft Video Converter Ultimate is a great choice. Powered by diverse AI technologies, Aiseesoft Video Converter Ultimate helps you achieve a variety of processing effects. It offers 11 AI models for you to choose from, including Video Quality Repair Model, Video Denoise Model, Frame Interpolation Model, Colorize Model, SDR to HDR Model, Video Stabilization Model, and more. In addition, it can be downloaded and tried easily and free of charge.

Descarga
![]() 100% Seguro. Sin anuncios.
100% Seguro. Sin anuncios.
![]() 100% Seguro. Sin anuncios.
100% Seguro. Sin anuncios.
What if my running video comes out not smooth enough?
To enhance the smoothness of running footage, it’s best to record at 60 fps next time. For already recorded videos, you can use Aiseesoft Video Converter Ultimate’s Frame Interpolation Model to improve smoothness and reduce stuttering.
How do I reduce a video size without losing quality?
You can adjust the video’s codec and bitrate. The most widely used video codec is H.264, but at the same resolution, videos encoded with HEVC (H.265) are 30% to 50% smaller than those in H.264. Lower the bitrate to a reasonable range—this won’t cause obvious quality loss. The recommended bitrate ranges are 3–6 Mbps for 1080p and 8–16 Mbps for 4K. Upload your video to Aiseesoft Video Converter Ultimate, click the gear icon in the bottom right corner, and you can freely adjust the bitrate and convert the video codec to HEVC.
How do I stably shoot a moving subject?
A gimbal significantly improves the stability of a camera or phone while moving. If possible, combine your phone, a mount, and a gimbal for optimal stability. If a tripod isn’t available, using just a gimbal to secure your phone is much better than holding it directly.
Conclusión
Here, we introduce two types of methods to Cambiar calidad de video on iPhone: one is adjusting your iPhone’s camera settings before recording, and the other is using Aiseesoft Video Converter Ultimate for processing after recording. With its powerful editing tools, Aiseesoft Video Converter Ultimate is a great option for enhancing your recorded video.
 Los 8 mejores potenciadores de vídeo con IA para mejorar la calidad del vídeo en 2025
Aquí tienes 8 potenciadores de video con IA, con características únicas, ventajas y desventajas. Descubre cómo elegir el mejor potenciador de video para ti y mejora tu video con mayor calidad.
 Los 5 mejores optimizadores de vídeo gratuitos (en línea y para PC) [Reseña de 2026]
Compara los mejores optimizadores de video gratuitos como CapCut, Media.io y Picwand. Corrige videos borrosos, mejora la resolución a 4K y elimina el ruido. Descubre las ventajas, las desventajas y las mejores alternativas de escritorio con IA.
 Guía completa para solucionar problemas de calidad de video de iPhone a Android con métodos sencillos
Los vídeos de iPhone a veces pueden verse borrosos en Android. Consulte nuestra publicación para descubrir la mejor manera de restaurar la calidad del video al transferir de iPhone a Android.
Video Converter Ultimate es un excelente conversor, editor y potenciador de video para convertir, mejorar y editar videos y música en 1000 formatos y más.
![]() 100% Seguro. Sin anuncios.
100% Seguro. Sin anuncios.
![]() 100% Seguro. Sin anuncios.
100% Seguro. Sin anuncios.
*Campo requerido
*Por favor ingrese un correo electrónico válido